Easy Shadows - 3 Ways
The Art of Applied Visual Thinking
Summer's almost here – time to take it easy.
With summer just around the corner, it's the perfect time to simplify your life. The season is about relaxing, spending time with loved ones, and enjoying the great outdoors. With that in mind, as the days grow longer and the school year starts winding down, we're shifting gears and kicking off our Simple Summer newsletter series. Throughout the summer, we'll share some of our best simple visual thinking tips and tricks to up your visual thinking game in 10 minutes or less.
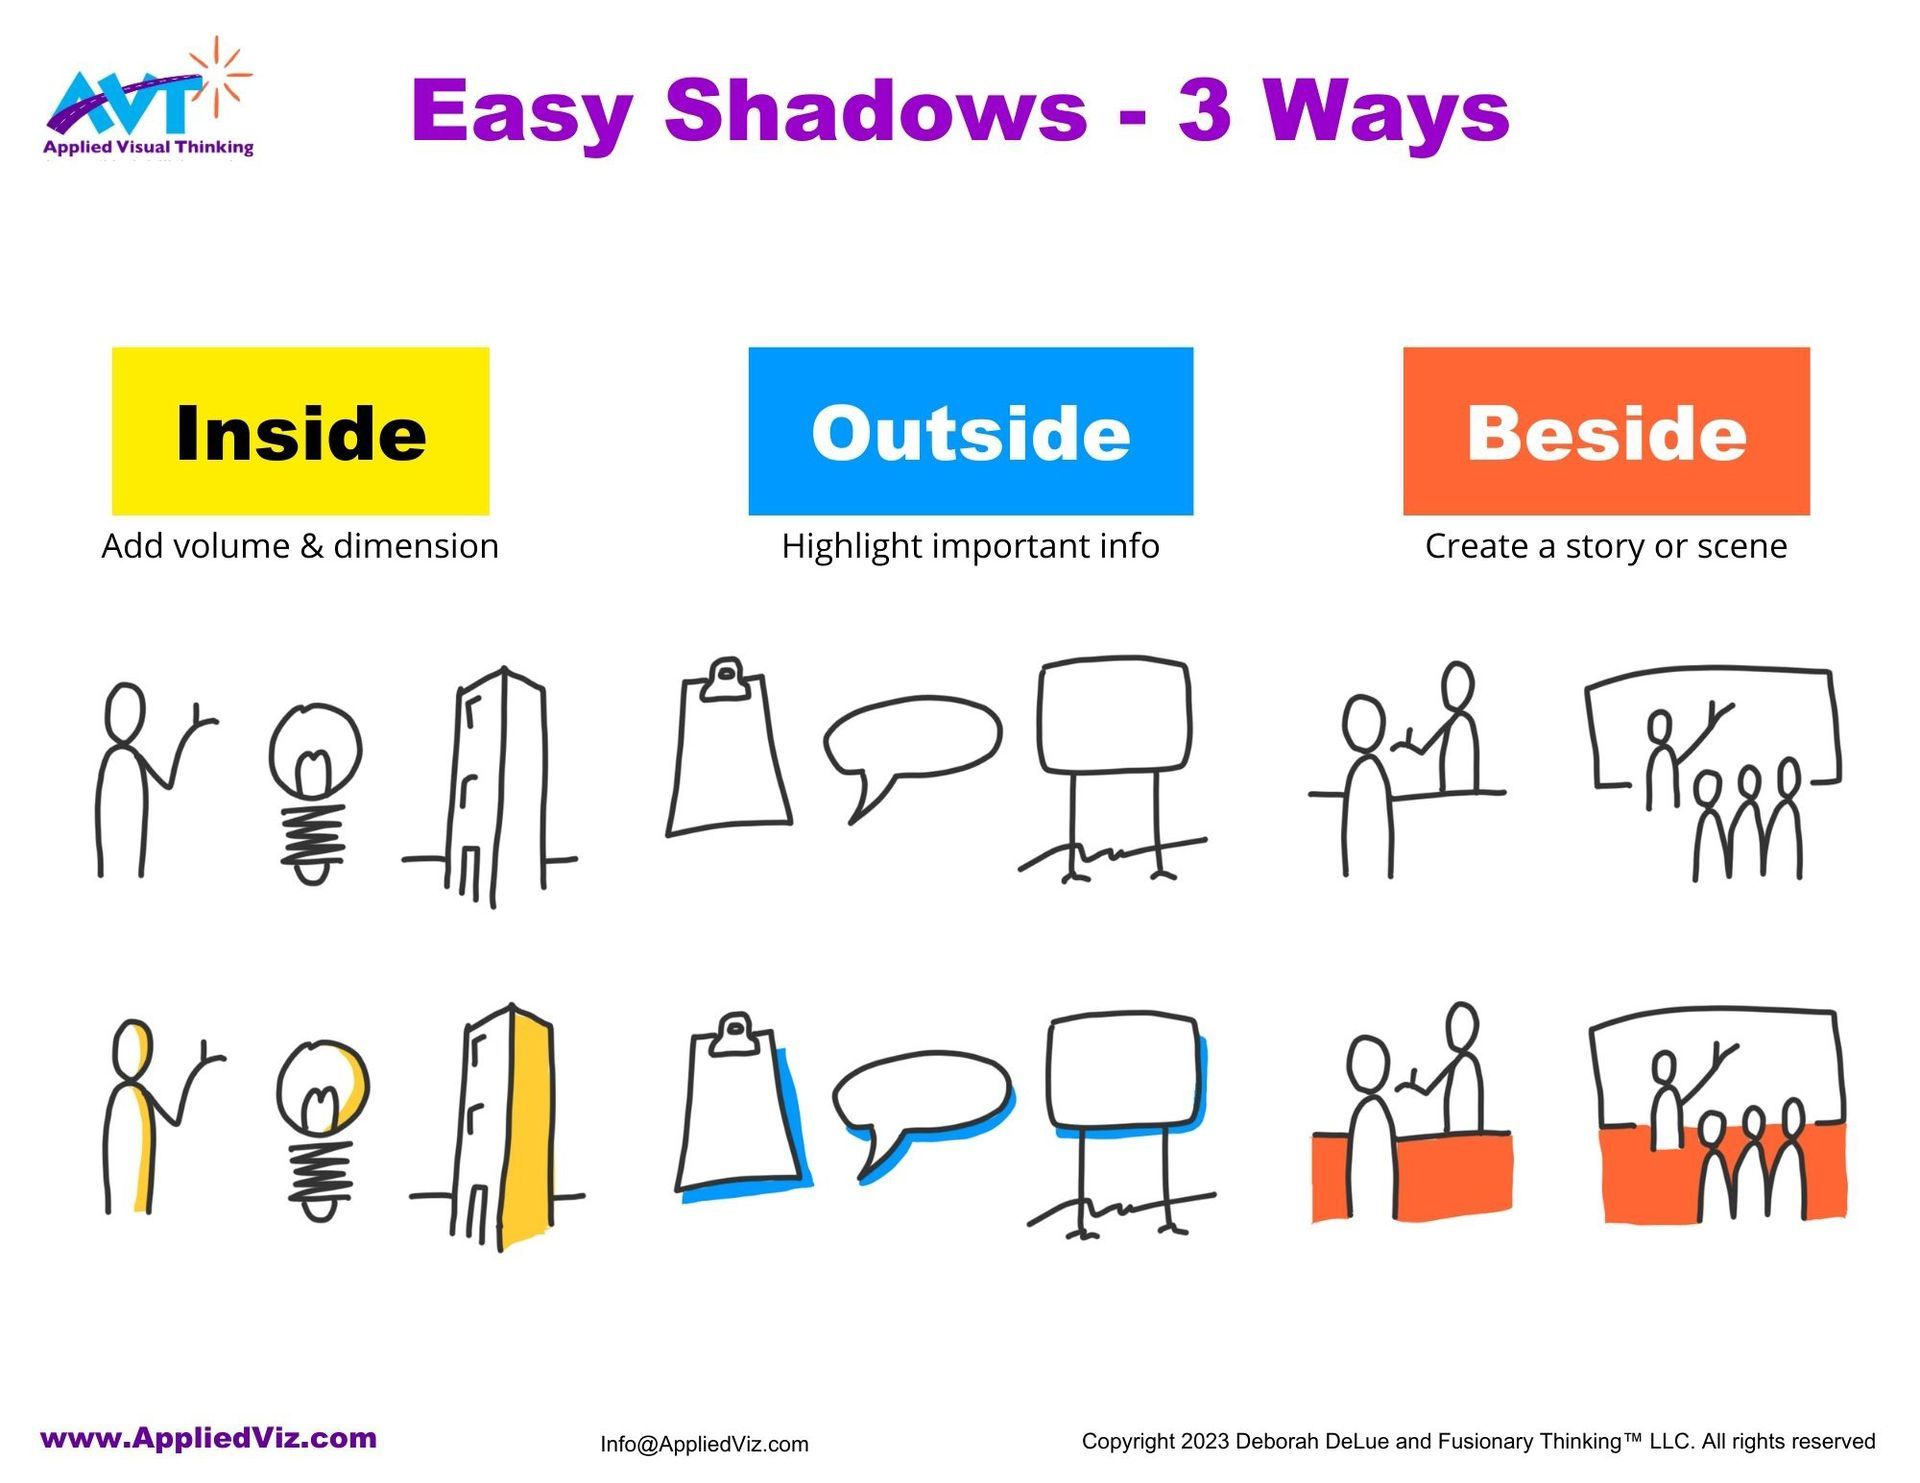
Today we will look at adding shadows to your visual thinking work. For example, adding shadows to a map, chart, or diagram can make it look more three-dimensional and help to convey depth and perspective. Shadows can also make the work more visually appealing, exciting and draw the viewer's eye to essential elements.
In addition to their aesthetic value, shadows can serve a functional purpose. For example, they can help distinguish between different layers or levels of the chart and make it easier to understand the relationship between other parts.
You may think, Deb, that's all good, but how do we do it? It's easy!
Here are three easy ways to add shadows to your visual thinking.
All you'll need is a black marker and a lighter-colored marker or highlighter; light gray, blue, yellow, pink, or orange are all great choices.
Want to give it a go?
Download the free handout, grab your pens, set a time for 10 minutes, and play along.
Inside - adding a shadow to the inside of an icon gives the impression of volume and dimension. This technique works particularly well for rounded or three-dimensional forms like a cube.

Step one
-
draw 3 or 4 simple icons of objects typically rounded or three dimensional in real life with a black marker—for example, an O-U person, a light bulb, or a tall building.
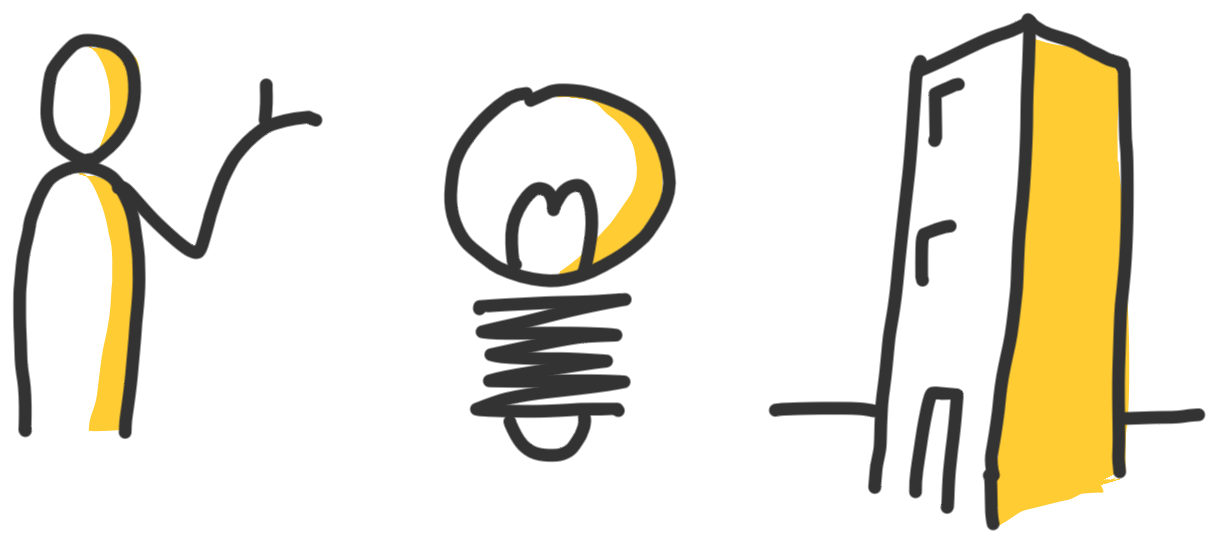
Step two - Add a stripe of color inside your shape along one side with your lighter-colored marker. That's it. Your eye will read the form as having more dimension.
Outside - adding a shadow to the outside of an icon draws attention to the icon and helps it stand out from the background. This technique works particularly well for container icons, such as speech or thought bubbles, or signs.
Step one
-
draw 3 or 4 simple container icons with a black marker—for example, a clipboard, a thought bubble, or a road sign.

Step two
-
Add a stripe of color just outside your shape along one side with your lighter-colored marker. The reader's eye will be drawn to shapes and the vital information they contain.

Beside - adding a shadow in the spaces between a collection of icons ties them together to create a scene and tell a story. Use this technique when you want the reader to view several icons as one unit.

Step one
-
with a black marker, draw 2 or 3 simple icons that together tell a simple story. For example, a customer standing at a counter across from a salesperson or someone giving a speech to a crowd of people.

Step two
-
with your lighter-colored marker, fill in the spaces between and beside icons to tie them together. With just a few marker swipes, you've set a scene and drawn attention to the story.
Adding shadows to a map, chart, or diagram can enhance clarity, depth, and visual appeal. In addition, it can make the image more engaging and exciting to look at and help communicate information more effectively to the viewer.
Remember, practice makes progress. Try this exercise the next time you're practicing your visual thinking or have a few extra minutes while waiting for your next call or meeting to start. You'll quickly become a champion at making your icons pop with just a few swipes of your marker.

